
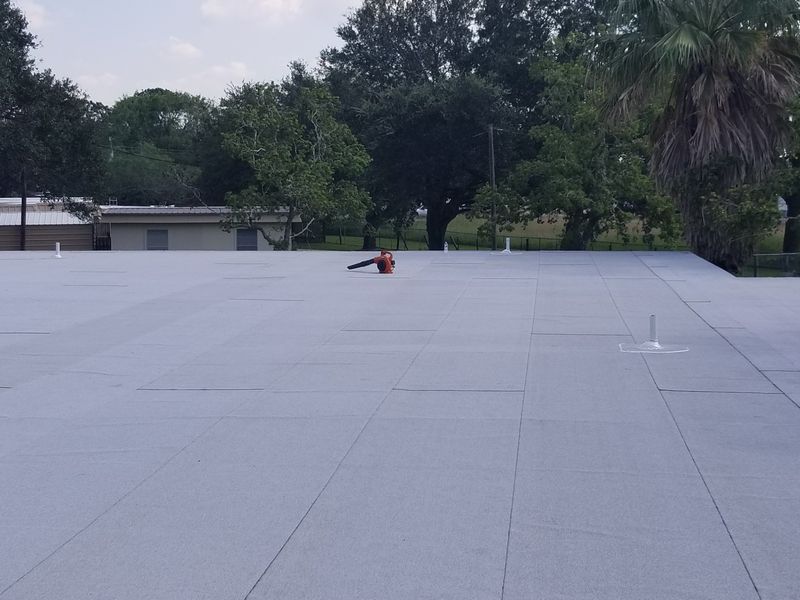
The cheapest hour a property manager spends on a commercial roof in any given year is the hour spent photographing it before the first storm. Most commercial roof claim disputes — the ones that drag out for months, get partially denied, or cap at below replacement cost — trace back to the same root cause: the adjuster cannot tell what was pre-existing and what the storm caused. Pre-season documentation eliminates that argument before it starts.
Here is the checklist we give property managers and facility teams before hail season.
Why Pre-Existing Condition Is the Adjuster's Favorite Lever
Every carrier's adjuster training emphasizes distinguishing storm damage from ordinary wear. On a residential asphalt roof, hail bruising is usually obvious. On a 15-year-old TPO or EPDM membrane, it is a much harder call. Ponding water, UV-degraded seams, cracked flashing sealant, and rust at drain bowls all look like they could be storm-related or they could be pre-existing. Without dated photos from before the storm, the adjuster gets to assume the latter. Carrier guidance often instructs adjusters to default to pre-existing where documentation is ambiguous. That is not malice; it is cost discipline.
Your job as the owner or manager is to remove the ambiguity.
What to Document Before the Storm
1. Membrane Condition, Slope by Slope
Photograph every roof area individually. A big-box store's 80,000 sqft roof should yield 40 to 60 photos. Get close enough that seams, penetrations, and surface texture are clearly visible. Shoot on a dry sunny day so contrast is strong and ponding is visible only where the membrane has truly settled.
2. Drains, Scuppers, and Overflow Outlets
Every drain bowl, every strainer, every scupper, every overflow. Photograph the bowl interior so any existing rust or sediment is documented. After the storm, an adjuster pointing at a rusty drain and saying "that was already bad" has a harder time if you have a clean-drain photo from April.
3. HVAC Curbs and Equipment Perimeters
Rooftop HVAC units are the single highest-claim-value area on most commercial roofs. Photograph the full perimeter of each unit: curb flashing, condensate line sealant, unit panels (hail often dents them), and the membrane within 3 feet of the curb. Photograph the unit's data plate so make, model, and year are captured.
4. Flashings at Walls and Penetrations
Every base flashing along a parapet, every counter flashing, every termination bar, every pipe boot. Flashings are where carrier adjusters find the most "pre-existing wear" to deduct.
5. Skylights and Smoke Vents
Close-up photos of each skylight or smoke vent with the glazing visible. Hail damage on polycarbonate or acrylic domes can be subtle; pre-storm photos make it obvious.
6. Walkway Pads and Service Paths
If walkway pads exist, photograph their condition. Hail-damaged pads are sometimes replaceable as part of a claim if their pre-storm condition is documented.
7. Ponding Areas
Shoot these on a dry day so the stained membrane from prior ponding is visible. Then, after any rain event, go back and photograph the ponding while it is full. The contrast between dry-day and wet-day photos helps tell the story of the roof's drainage performance.
8. The Paper Trail
Beyond roof photos, pull together:
- Original roof installation date, manufacturer, and membrane type.
- Most recent service invoices (sealant repairs, seam re-welds, drain cleanings).
- Current manufacturer warranty terms and any maintenance-compliance requirements.
- Your last professional inspection report, ideally dated within the last 12 months.
Adjusters reviewing a claim with a dated pre-storm inspection report and a photo library move noticeably faster toward fair scope than adjusters looking at nothing but the post-storm roof.
How to Organize It So You Can Actually Find It
A folder on a shared drive with a predictable structure beats a messy phone camera roll. We recommend:
- One top-level folder per building.
- Subfolders by year.
- Subfolders within the year for pre-season and post-event documentation.
- Every photo includes the date in the filename (most phone cameras do this automatically in EXIF, but duplicate it in the name for non-technical viewers).
When the adjuster asks for documentation, you email a link to the folder rather than spending a day scraping it together.
Who Should Do the Documentation
Three options, each with trade-offs:
- Your own staff. Free, but quality varies and rooftop safety training is required.
- Your maintenance contractor. Inexpensive if they are already on site for seasonal service. Insist on date-stamped photos and a written condition report, not just "we looked."
- A roofing contractor on a pre-season inspection agreement. The most defensible documentation because it is independent, dated, and paired with professional judgment. We offer this as part of our Commercial Maintenance Program, and many enrolled buildings now treat the pre-season walk as standard operating procedure.
When to Do It
In Colorado, hail season kicks off reliably in mid-to-late April and runs through September. April or early May is the right window for pre-season documentation. In Kansas, the active severe-weather season starts slightly earlier; aim for mid-March. Once documented, update the file annually.
Related Reading
Need a Pre-Season Commercial Roof Inspection?
We perform documented pre-season inspections for property managers, HOAs, and commercial owners along the Front Range and the KC metro. Photo report, condition summary, and recommendations — no obligation.
Schedule an Inspection or call 855 ROOF-001