
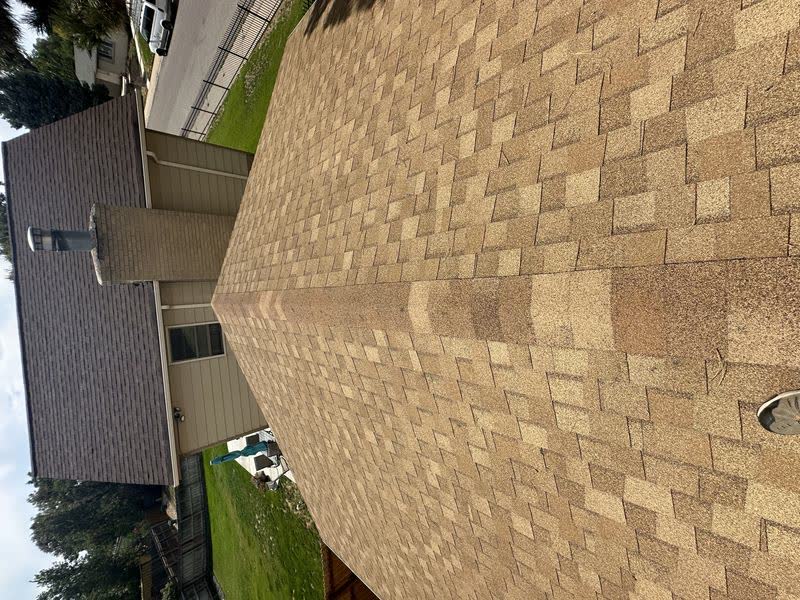
Most mid-winter roof claims trace back to something that should have been addressed in October. Ice dam damage, frozen downspouts that split away from the fascia, attic condensation that rots out sheathing, and heat cable fires are all preventable by an afternoon of fall maintenance. Here is the checklist that saves homeowners in Denver, Kansas City, and everywhere between from a February insurance call.
Schedule this for early to mid-October. After that, cold mornings make caulking and sealant work unreliable.
1. Clean the Gutters Thoroughly
Every leaf, every pine needle, every aspen catkin, every handful of cottonwood fluff. A clean gutter in October is what drains the first snow melt and prevents the first ice dam. A clogged gutter holds water that freezes, expands, and lifts the gutter away from the fascia.
Work from a stable ladder or hire a service. Run a hose through after scooping to verify every downspout flows freely. If a downspout is blocked, clear it with a snake or a pressurized hose nozzle from the bottom up.
2. Check the Gutter Hangers and Pitch
Walk each section of gutter and verify:
- Hangers are tight, not backed out of the fascia.
- The gutter pitches slightly toward the downspout (a fraction of an inch per 10 feet).
- No sagging sections where water pools.
- End caps are sealed and not leaking.
Pooled water in a cold-weather gutter becomes a block of ice. Tighten hangers and re-pitch where needed.
3. Inspect All Flashings
Chimney flashing, skylight flashing, step flashing at wall-roof intersections, pipe boots, and vent flashings. Look for:
- Cracked or missing sealant beads.
- Lifted or bent flashing metal.
- Rubber pipe boots with visible cracks.
- Counter-flashing pulled out of masonry joints.
Refresh sealant on any questionable joints using a quality polyurethane or tripolymer sealant (not silicone, which does not adhere long-term to asphalt shingles). A $10 tube of sealant buys months of reliability.
4. Check the Roof Field for Loose or Missing Shingles
Walk the roof if you can do it safely, or stand across the street with binoculars. Look for:
- Shingles lifted at the corners or visibly flapping.
- Missing shingles from summer wind events.
- Hail bruises that have not been documented.
- Granule loss in specific areas (check gutters for granule accumulation).
Any of these are a reason to schedule a professional inspection before the first snow.
5. Verify Attic Ventilation Is Functional
This is the step most homeowners skip, and it drives the most winter roof damage. Balanced attic ventilation (equal intake at soffits and exhaust at ridge) keeps the attic air temperature close to the outside. An under-ventilated attic traps warm air, melts snow from below, refreezes at the cold eaves, and creates ice dams.
From inside the attic on a cool fall day, check:
- Soffit vents are not blocked by insulation (bat or blown insulation that has drifted into the soffit cavity).
- Ridge or gable exhaust vents are clear and not screened with debris.
- No evidence of moisture staining on the underside of the roof deck.
- Insulation is at least R-49 (current Colorado code) and not compressed.
Our separate post on attic ventilation goes deeper on this topic.
6. Seal Attic Bypasses
Warm, moist interior air leaks into the attic through recessed light fixtures, plumbing vent stack penetrations, attic access hatches, and gaps around wiring. That moist air condenses on the cold underside of the roof deck and rots it over time.
Common bypasses to seal:
- Around the attic access hatch (weatherstripping plus insulation on the hatch lid).
- Around bathroom exhaust fan housings.
- At the top of interior walls where the wall plate meets the drywall.
- Around chimney chases (seal with sheet metal and high-temp caulk, not foam).
- Around plumbing and electrical penetrations.
A few tubes of fireproof caulk, a roll of weatherstripping, and an evening's work catches most of the bypasses.
7. Inspect Chimney and Flue Conditions
A chimney that is structurally deteriorated becomes a bigger problem in winter when freeze-thaw cycles accelerate the damage. Look for:
- Crumbling mortar between bricks.
- Cracked chimney crown (the concrete cap at the top).
- Missing or rusted chimney cap over the flue opening.
- Evidence of water staining on the chimney's interior where it passes through the attic.
A damaged chimney crown lets water into the masonry where it freezes and splits bricks apart. A cracked crown repair is cheap; a full chimney rebuild is not.
8. Check Skylight Seals
Walk the perimeter of every skylight from inside the home and check for staining or paint peeling. From outside, verify:
- Perimeter flashing is tight and sealed.
- Glazing seal is not cracked or separating.
- Counter-flashing is not lifted.
Skylights are a top-three source of cold-weather leaks. Address any questionable seal before the first snow.
9. Clear Roof Valleys and Behind Chimneys
Any debris caught in a valley or behind a chimney becomes an ice dam seed. Sweep or blow these areas clean. Particular attention to valleys under overhanging trees.
10. Install or Test Heat Cable (If Your Roof Requires It)
Heat cable is a last-resort ice dam prevention for roofs where insulation and ventilation cannot be improved further (older historic homes, complex rooflines, specific problem areas). It is not a replacement for proper ventilation. Installed correctly, heat cable prevents ice dams in specific zones during the worst cold snaps.
If you have existing heat cable:
- Test the circuit by energizing it on a cool morning.
- Inspect cable for cracked or split insulation.
- Verify the cable is routed along eaves and into downspouts as designed.
- Replace cable sections that are damaged. Heat cable typically has a 5 to 10 year service life.
If you do not have heat cable but have chronic ice dam problems, address insulation and ventilation first. Heat cable is a bandage, not a fix.
11. Disconnect and Winterize Exterior Hose Bibs
Not a roof item, but part of the same afternoon's work. A frozen hose bib splits the pipe inside the wall and floods the wall cavity the first time it thaws. Disconnect hoses, drain the bib, and close the interior shutoff if you have one.
12. Document With Photos
Before you leave the roof for the winter, take a set of October photos: every slope, every flashing, every gutter, every skylight, and the general exterior. These become your pre-winter baseline if anything happens during the season. A claim adjuster reviewing a February ice dam damage case benefits enormously from an October-dated photo set showing the pre-winter condition.
If You Want to Outsource It
A fall roof winterization service typically takes 60 to 90 minutes on site, covers everything above, and costs $150 to $350 depending on roof size and complexity. The cost-to-peace-of-mind ratio is favorable for anyone who does not enjoy ladders.
Related Reading
Want a Professional Fall Winterization?
We perform documented fall roof winterization in the Denver and Kansas City metros. Gutters, flashings, attic check, and photo report.
Schedule a Winterization or call 855 ROOF-001