
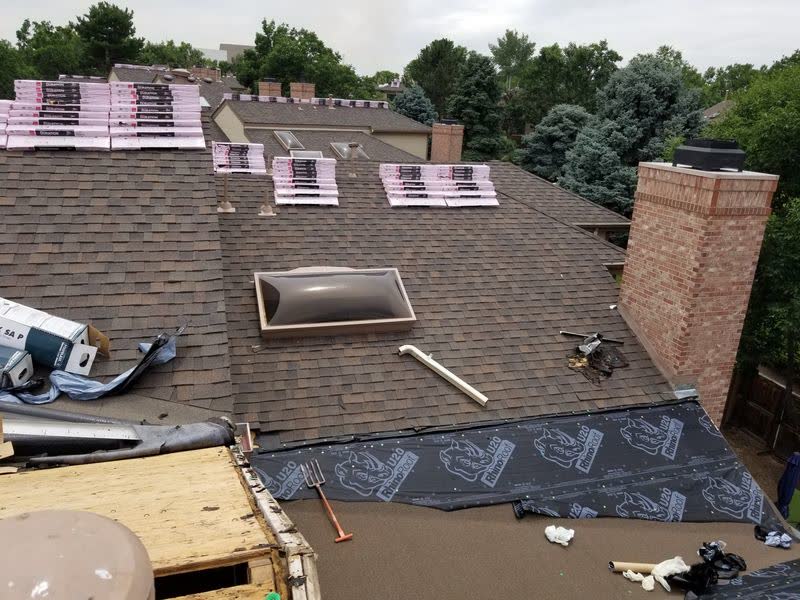
A community-wide roof replacement project — 50 to 300 residential units under one HOA after a major hail event — is one of the most complex construction projects a volunteer board will ever manage. Done well, the community emerges with uniform new roofs, healthy reserves, and satisfied residents. Done poorly, it becomes a special-assessment fight that drags through two board election cycles and ends in litigation.
We have walked HOA boards through community-wide replacements across the Front Range and the Kansas City metro. The playbook below is what consistently works.
Step 1: Confirm the Scope Before Committing to Anything
The first board mistake is reacting to the most vocal owner. Owner Smith on Cedar Lane had a skylight leak and is demanding the HOA replace his roof. That does not mean the entire community needs new roofs.
Commission a community-wide inspection from a contractor who is not chasing the claim. Every building should be inspected, every slope photographed, and every hail bruise mapped. The output is a master damage spreadsheet that lists:
- Building address and roof identifier.
- Roof age (if records exist) or estimated age.
- Damage severity (none / cosmetic / functional / total).
- Photo references.
- Estimated replacement cost.
This spreadsheet is the foundation for every subsequent decision. Without it, the board is guessing.
Step 2: Loop in the Insurance Carrier Early
Most HOA master policies cover roofs, though the coverage structure varies (some use RCV, some ACV, some have cosmetic exclusions, some have percentage-of-total deductibles). The carrier needs to be notified of the loss, and a carrier adjuster should inspect alongside your contractor's inspector. An inspection with both parties present produces a scope agreement in a single visit rather than weeks of back-and-forth.
Before the joint inspection, the board should:
- Pull the master policy and read the roof coverage section carefully.
- Identify the deductible structure (flat vs. percentage-of-insured-value).
- Understand the cosmetic vs. functional language.
- Check whether the policy has a matching clause or state statute applies.
- Confirm the RCV / ACV determination and depreciation formula.
Our RCV vs ACV post explains the math that will drive the payout.
Step 3: Vendor Selection for Community-Wide Work
A contractor capable of replacing one house in a day is not necessarily equipped to run 150 houses over three months. Community-wide work requires:
- Crew depth (multiple concurrent crews, not one crew doing all buildings sequentially).
- Project management dedicated to the HOA (a named project manager, not a rotating cast).
- Documentation infrastructure (per-building photo sets, progress reports, completion certificates).
- Warranty administration that can track which building got which materials on which date.
- References from other community-wide projects of similar size.
Issue a formal RFP (not just emails for "an estimate"). The RFP should include a scope of work, the damage spreadsheet, required insurance minimums, bonding requirements if any, and a submission deadline. Three bids is the minimum. Five is better.
Evaluate bids on price, schedule, product selection, crew management plan, resident communication plan, and references. The lowest bid wins only if it is from a credible contractor with a credible schedule.
Step 4: Phasing Strategy
Do not replace every building in one month. A phased approach produces better results:
- Phase 1: Worst-damage buildings first. These have the highest leak risk and the strongest insurance case.
- Phase 2: Moderate-damage buildings. Install quality is already proven by Phase 1.
- Phase 3: Lower-priority buildings (if scope is funded).
Phasing gives the board time to adjust. If Phase 1 goes poorly, the board can change contractors before Phase 2. If the insurance payout is smaller than expected, Phase 3 can be delayed rather than creating a special assessment.
Step 5: Resident Communication Before Work Starts
Residents who feel informed become advocates. Residents who feel surprised become complaint generators. The communication plan should start before the RFP closes and continue through Phase 3.
Minimum resident communications:
- Initial notice: "A community-wide inspection has identified damage; the board is evaluating responses." Framing matters.
- Scope-and-schedule notice: "Here is the approved scope, here is the contractor, here is the phasing schedule."
- Per-building 7-day notice: "Your building is scheduled for replacement on [date]."
- Per-building day-of notice: "Work begins today. Here is what to expect."
- Per-building completion notice: "Work is complete. Here is the documentation for your records."
A dedicated project email address and a web page with the rolling schedule cut inbound questions in half.
Step 6: Reserve Funding vs Special Assessment
The board's single most important decision is how to fund any gap between insurance proceeds and total project cost. Options:
- Fund the gap entirely from reserves.
- Partial reserve plus partial special assessment.
- Full special assessment (rare).
- Financing (community-wide loan secured by dues).
The right answer depends on the reserve health, the size of the gap, the community's tolerance for special assessments, and state statute. Most HOAs we work with fund the deductible from reserves and pass the rest through to the insurance carrier. Special assessments are reserved for uninsured improvements (Class 4 upgrade, color change, added ventilation, etc.) that the board chooses to fund.
Step 7: Product and Aesthetic Decisions
Community-wide replacement is the rare opportunity to standardize. Decisions the board should make consciously:
- Shingle manufacturer and product line (upgrade to Class 4 impact-resistant? See our Class 4 discount post).
- Color (keep existing vs. refresh). A color change requires an architectural review process even within the HOA.
- Ridge vent vs. box vents (standardize for uniform appearance).
- Gutter replacement (often damaged in the same storm).
- Fascia and soffit repairs.
- Skylight replacement (if aged and leak-prone; easier to batch with the roof).
Standardizing makes future repairs faster (matching shingles from one stocked color) and future insurance claims cleaner (one product, one install date).
Step 8: Contract Protections for the Board
The HOA contract should include protections a homeowner contract typically does not:
- Completion schedule with liquidated damages for delay beyond agreed float.
- Mechanic's lien release with each progress payment.
- Insurance certificates naming the HOA as additional insured.
- Performance bond or payment bond on projects over a threshold (commonly $500K for community-wide work).
- Photo-documented completion per building before payment release.
- Manufacturer warranty registration for each building.
- Final lien waivers from all subcontractors.
Run the contract past the HOA attorney before signing. This is not an optional line item on a project of this size.
Step 9: Progress Payments and Documentation
Community-wide work is paid in phases, tied to completion milestones. A typical schedule:
- Material deposit: 10 to 20 percent at contract signing.
- Progress payment per building: on completion of each building, paid within 10 business days of documentation delivery.
- Retainage: 5 to 10 percent held until final warranty registration and closeout.
Never pay in full until the project is complete and all documentation is delivered. Contractors who demand full payment up front are a red flag.
Step 10: Closeout and Warranty Registration
The project is not complete when the last shingle goes on. Closeout includes:
- Per-building manufacturer warranty registration (golden-seal level, not limited lifetime) delivered to the HOA.
- Per-building photo set (10 to 20 photos per building).
- Consolidated master warranty binder.
- Final lien waivers.
- Final walk-through punch list with contractor sign-off.
- Debris-free site verification (magnet sweeps for nails, especially around pet areas).
Store the master binder in the HOA records. It becomes the baseline for any future warranty claim or insurance event.
The Bottom Line
A community-wide roof replacement is a major board project but not an insurmountable one. The boards who manage it well treat it as a multi-phase program — inspection, scoping, vendor selection, phased execution, documented closeout — rather than a single event. The boards who struggle treat it as an emergency and skip the planning.
Our team has run community-wide projects from 28 to 240 buildings. We bring the documentation, crew depth, and project management infrastructure these projects require. If your board is facing a portfolio-wide replacement, we are happy to walk through the scoping process with no obligation.
Related Reading
HOA Board Facing a Portfolio Replacement?
We run community-wide replacement programs across Colorado, Kansas, Missouri, Nebraska, Wyoming, and Utah. Documented scoping, phased crews, dedicated HOA project management. No obligation.
Schedule a Board Consultation or call 855 ROOF-001