
The average Colorado attic was insulated to whatever the code minimum was the year the house was built. For homes built before about 2009, that is R-30, which is roughly 9 inches of blown-in fiberglass. The current Colorado residential code minimum is R-49, which is closer to 14 inches. The difference between those two numbers is your January heating bill.
Adding insulation to an existing attic is normally an attic-access job. Crews work from inside the house, vacuum out the old material if needed, blow new material in around joists and HVAC penetrations, and try not to disturb the rest of your stuff in storage. It is a fine retrofit if there is no other reason to be on the roof.
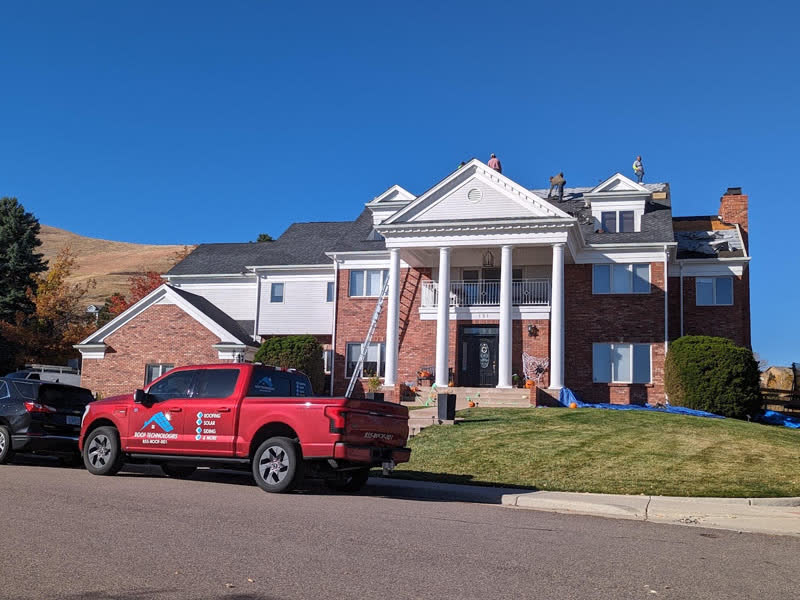
But if your roof is being replaced anyway, the math changes. The deck is exposed from above. The labor of accessing the attic is essentially free, because crews are already on the roof. That is a window of about 24 hours when adding R-value costs material plus a couple of crew hours, instead of the full retrofit price.
What "Roof-Off" Access Actually Looks Like
During a re-roof, the typical sequence is tear-off, deck inspection, deck repair if needed, underlayment, then new shingles or panels. Between deck inspection and underlayment is the only moment when you can see down into the attic from above without crawling into it.
If insulation upgrades are planned in advance, the crew can:
- Pull soffit baffles and reset them. A common reason older attics underperform is that blown-in insulation has settled across the soffit vents, blocking attic airflow. Pulling baffles from above and resetting them with proper soffit clearance is a 30-minute job from the deck — a multi-hour job from the attic.
- Add rigid foam over the deck. For homes targeting net-zero or just very high efficiency, 1.5 to 3 inches of rigid foam (polyiso or XPS) over the existing deck adds R-9 to R-18 outside the building envelope without disturbing interior insulation. The shingles go on top of the foam with a new underlayment layer. This is the cleanest path to a high-performance assembly.
- Air-seal the attic floor from above. If the attic insulation is going to be vacuumed and replaced anyway, the moment after vacuum and before re-blowing is when you can spray-foam the gaps where insulation meets the top plates of walls, around can lights, around plumbing penetrations, and around the chimney chase. Air-sealing improves R-value performance more than people expect — a tight ceiling at R-30 outperforms a leaky ceiling at R-49.
- Replace bath fan ducts. Crushed flex ducts dumping into the attic show up in nearly every pre-1995 home we re-roof. Reaching them from the attic is awkward; from above through a removable deck panel during tear-off, it is straightforward.
R-Value Math, Honestly
The marginal payback on insulation depends on your fuel cost, your climate zone, and the delta you actually achieve. For a Front Range home heated by natural gas:
- Going from R-19 to R-49 typically saves 15 to 25 percent of heating costs.
- Going from R-30 to R-49 typically saves 5 to 10 percent.
- Going from R-49 to R-60 saves under 3 percent — diminishing returns kick in hard above the code minimum.
For a $1,800-per-year gas bill, those percentages translate to $90 to $450 in annual savings, depending on starting point. Material cost during a re-roof is typically $400 to $1,200 for the insulation upgrade itself plus $200 to $600 for proper air-sealing. Payback is usually 3 to 8 years on a re-roof project, versus 8 to 15 years on a standalone insulation retrofit.
A real-world example: a 2,400-square-foot 1998 Highlands Ranch home we re-roofed last fall. Original insulation was settled R-25 in fiberglass. We pulled the existing material, air-sealed the ceiling, and re-blew to R-49 with cellulose. Total upgrade cost was $1,650 against a $34,000 re-roof project. Owner reported the next gas bill was 22 percent below the prior winter's matched-degree-days bill, which works out to about a 4-year simple payback. The owner had been quoted $4,200 for a standalone insulation retrofit before the re-roof was scheduled.
Vapor Barriers and the Colorado Climate Zone
Most of Colorado is in IECC climate zone 5B (cold, dry). Some mountain areas are zone 6B or 7. Climate zone matters for one specific reason: where the vapor barrier goes. In zone 5 and colder, a Class I or II vapor retarder belongs on the warm-in-winter side of the insulation — which means under the drywall ceiling, not in the attic. In zone 5 and warmer, no vapor barrier is generally required at the ceiling at all.
This becomes a roof-off issue if a previous owner stapled poly vapor barrier on top of the attic insulation. That is the wrong location and it traps moisture. During a re-roof with attic access, that misplaced poly should come out. If the original attic was insulated under a ceiling-level vapor retarder, a re-roof with insulation upgrade does not require any new vapor work — just air-sealing and additional R-value.
The exception is conditioned attics — homes where the HVAC equipment lives in the attic and the attic is part of the conditioned envelope. Those have a different vapor strategy and benefit from rigid foam over the deck rather than blown-in below it. We will spec accordingly if your home falls in that category.
What Code Currently Requires
The 2021 IECC, which Colorado adopted with state amendments in 2023, requires R-49 in attics in zone 5B for new construction. A re-roof does not legally trigger the new-construction insulation requirement in most Colorado jurisdictions — but if you are in a post-Marshall Fire WUI zone, the local amendment may require attic-floor air-sealing as part of any roof permit. Boulder, Superior, Louisville, and Boulder County have varying versions of this.
For HOA-governed communities, attic upgrades are not typically part of the architectural review since they are invisible from the street. We document them anyway in the closeout binder so future buyers and appraisers see the work. Our HOA roof approval guide covers the related submittal mechanics.
What This Means If You Are Re-Roofing Soon
If a re-roof is on your calendar in the next six months, this is the moment to ask three questions:
- What R-value is currently in your attic? A quick attic visit with a tape measure usually answers this. The number written on the original blower nameplate may not match what is actually in the attic 25 years later.
- Is your attic floor air-sealed? Look for can lights with no IC-rated sealing, unsealed top plates, and bath fan ducts that terminate inside the attic rather than through the roof or a soffit.
- Do you want the upgrade as part of the re-roof scope? Add it to the contractor's scope before the contract is signed, not after tear-off. Mid-project additions are more expensive and slow the schedule.
For broader re-roof planning, see our day-by-day re-roof timeline. For repair vs. replace decisions, see repair vs. replace. Service area pages are at locations.
The Short Version
If your attic is below current code R-value and you are about to re-roof, add the insulation upgrade to the project scope. The labor cost is half what a standalone retrofit would run, the work is cleaner because the attic is accessible from above, and the air-sealing window is open in a way it never is during a normal retrofit. If you re-roof and skip this step, you are leaving money in your attic for the life of the new roof.
Re-Roofing Soon?
Add the insulation conversation to your scope walkthrough. We carry blown-in cellulose and fiberglass on every residential re-roof crew, and we run rigid-foam-over-deck packages for homeowners targeting deeper energy retrofits.
Request a Re-Roof Quote or call 855 ROOF-001